Cake of the Month – January 2015

Finally, we’re nearly catching up with our Cake of the Months – we’re into 2015 now at least! This cake was new baker Sophie’s first bake for us. We decided that we’d let her stay 😉

If you’ve ever wondered how to make one of *those* Barbie cakes then wonder no more…

FCFK - little Barbie cakeName of baker: Sophie Simpson
Name of cake: Princess Barbie

Ingredients:
Vanilla sponge cake, buttercream icing, raspberry jam.

Method:
Wrap Barbie in clingfilm (including her hair) in order to protect her from the icing. Stack 3/4 sponges with buttercream and jam until the height reaches Barbie’s torso. Cut a circular hole in the centre for Barbie and shave the top and sides into a bell shape.

Decorate as desired by piping/spreading buttercream dyed pink with food colouring around the cake and finishing with ribbons/edible decorations.

About the baker:
With a busy job, I rarely get a chance to cook dinner, let alone bake, but it’s something I really enjoy therefore I thought FCFK Hackney would provide a great opportunity to do some baking as well as contributing to a wonderful cause.


Cake of the Month – December 2014

Talking of ever so cute cakes … awww, this snowman is just the most adorable thing. And the best thing about volunteering for us for baker Anna? She gets to lick the bowl! Yum yum!

FCFK - cheeky snowman cakeName of baker: Anna Greenwood
Name of cake: Snowman

Ingredients:
For the cake-
Five eggs; then same weight as eggs of self-raising flour, sugar and butter. One or two teaspoons of vanilla extract.
For the buttercream–
250g butter, 500g icing sugar, one teaspoon of vanilla extract
Decorations–
Coloured fondant icing, sweets, carrots, whatever works…

Method:
Heat oven to 180 / 160 if fan. Cream butter and sugar until light and fluffy. Add eggs one by one, mixing thoroughly as each is added. Add vanilla extract. Sieve and fold flour into the mixture carefully without knocking the air out or over mixing. Divide between two tins and bake for 30 minutes until springy, but keep an eye on them after 25 minutes. Allow to cool and make buttercream by mixing the ingredients together.

When cake is cool, cut one cake into a smaller round for the head (unless you’ve baked in two different sized tins), then cut an inch of cake off each round so one can sit on the other. Lather it in buttercream, inside and out if you like. Smooth the outside with a scraper and get it as neat as you can. Give your snowman a face with sweets, liquorice or coloured icing for eyes, nose and mouth. Make a scarf by rolling out two strips of coloured icing, cutting into one end for the authentic frayed scarf look. Make a hat or anything else you fancy. Doesn’t he look nice? Now EAT HIM.

About the baker:
I’m a DJ and work from home so it’s easy for me to whip up a cake during the day. Plus I get to lick the bowl after and everyone knows cake mix is the best bit of this whole baking process. FCFK Hackney is such a great charity and idea and it’s so nice to be part of it and make something fun to be enjoyed at a celebration. My decorating may not be Great British Bake Off worthy, but the cakes always taste good!


Cake of the Month – September 2014

Oh balls. It’s November. How did that happen? Better late than never, hey? Here’s September’s Cake of the Month – which is a spectacular masterpiece by anyone’s standards.

Often cakes for children are very literal; a cartoon character’s face for example (not that there’s anything wrong with that – we are huge fans of Mickey’s grin or Spiderman’s mask). The brief for this cake was Snow White and we love how baker Becca has styled it to the max. It doesn’t have Snow White’s face on it, but this cake – in colour and symbolisation – is undeniably Snow White. We love it.

FCFK - snow white cake

Name of baker: Becca Gale

Name of cake: Snow White Cake

Ingredients:
Vanilla sponge (flour, sugar, margarine, eggs, vanilla extract)
Strawberry jam
Buttercream icing
Fondant icing

Method:
I made two sponges of different sizes and then sliced them both in half when baked and cooled. I filled each sponge with buttercream and jam and then stacked them so that the smaller sponge sat on top of the larger one. I then covered the cakes in coloured buttercreams and made the apple and bow decoration out of fondant icing which I painted with food colouring.

About the baker:
I have always loved baking but as I live with only my boyfriend I don’t like to bake too often (keeping our waistlines in mind!). When I heard about FCFK Hackney I thought it would be a way for me to do some extra baking and it is for such a great cause. I always loved the birthday cakes my mum made for me growing up and think that every child deserves a homemade cake baked with care for their birthday.


Cake of the month – June 2014

June’s cake of the month was made by one of our newest bakers. The cake is pretty special as we’re sure you’ll agree – it’s bright and colourful, and fulfills the unusual brief (Dragon Ball Z? Yes, we had to Google it too!) – but, also, its baker, Clare, has already made a handful of cakes for us in just a couple of months. Top cake. Top baker. Happy us.

FCFK - Goku cake


Name of baker: Clare Brewer

Name of cake: Dragon Ball Z (Goku) cake

Ingredients/method: A standard Victoria sponge cake recipe, with strawberry jam in the centre, then covered in vanilla buttercream and fondant to decorate.

About the baker:
I love baking and I stumbled across this charity about a year ago, so I looked for local groups and at the time Hackney was my nearest one.

It’s satisfying being able make cakes for someone else, whilst at the same time honing your skills as a baker, and of course not having to eat everything you bake!


Cake of the month – May 2014

We’ve got another corker of a cake for May’s cake of the month. Its baker, Julia, is also a bit of a corker in our eyes, producing cake after imaginative cake for us. She is not a One Direction fan. She didn’t know the names of the boys in that band. But she became one and learnt their names for this project, and in doing so, we can imagine, made one Hackney birthday girl last month feel very special indeed. Thank you, Julia, for the dedication you show to the cause – having to Google Harry Styles is going above and beyond!

FCFK - 1D cakeFCFK - 1D cakeFCFK - 1D cake

Name of baker: Julia Thackray

Name of cake: The Only Direction is One Direction!

This was a standard Victoria sponge recipe with strawberry jam in the middle, covered with buttercream and rolled icing and topped with cut-out icing decorations and glace icing writing.

Ingredients:
For the cake
• 400g caster sugar
• 400g softened butter
• 8 eggs, beaten
• 400g self-raising flour
• 1 tsp baking powder
• 1 tsp vanilla essence
For the filling
• strawberry jam
For the decoration
• Buttercream icing made with butter and icing sugar
• Ready to roll icing – white for coating the cake and coloured red and black with colouring gel for the cut out decorations.
• Glace icing made with icing sugar and water for writing

Method:
I made one large square cake and when baked cut it in half and sandwiched it together with jam.
1. Heat oven to 190C/fan 170C/gas 5. Butter the tin.
2. Beat butter and caster sugar in large bowl.
3. Beat eggs hard till light. Add vanilla essence
4. Beat eggs in a little at a time to the butter and sugar
5. Fold in the flour and baking powder (sifted together).
6. Pour the mixture into the tin and smooth.
7. Bake for about 20 mins until golden and the cake springs back when pressed. Turn onto a cooling rack and leave to cool completely.

About the baker:
I live in Stoke Newington with my two children. I’m a family lawyer and mediator and now work in legal training. I really enjoy baking and especially the challenge of the special occasion cake. My kids have always loved having a birthday cake and usually I make something on a theme that they are particularly keen on that year or related to the theme of the party. This year my son had a Phoenix cake for a ‘Harry Potter’ birthday and my daughter had a Midsummer Night’s Dream cake.

When I heard about the FCFK initiative I just thought what a brilliant and simple idea it was to match up people keen to make cakes (but don’t necessarily want to eat them!) with kids who would really appreciate a homemade cake, just for them on their special day. It’s been a lot of fun, working out what to make given the ideas that come from the kids or their carers.


Cake of the month – April 2014

It’s approaching the end of May; let’s face it, it’s nearly June; and here we are with April’s cake of the month.  Hey ho.

We picked this cake for it’s beautiful simplicity. It’s pretty, pink… perfect! And we love that baker Jen wants to share some of the happiness she had as a child with other children in Hackney.

FCFK - tiny butterfliesName of baker: Jen Shepherd.

Name of cake: Princess Perfect.

Ingredients: Fairtrade granulated sugar, Fairtrade icing sugar, baking powder, self raising flower, eggs, butter, semi skimmed milk, organic strawberry jam, double cream, pink food colouring and sugar butterflies.

Method: Nothing special – I just followed a Mary Berry recipe plus a little patience and use of my learning from our great cake decorating class last Christmas to perfect the butter icing.

About the baker: I chose to volunteer with FCFK Hackney because I was incredibly lucky as a child to have a very happy upbringing and everything I needed, I had. I was so fortunate to have been surrounded by amazing parents, siblings, friends and family friends and if I can just pass a little bit of that on and repeat my experiences for others, I am very happy to do so. I also work for Fairtrade and work on the sugar category, where baking is starting to look very interesting for us. All Tate & Lyle products are Fairtrade and if by any way we can further our message of fairly traded goods and support the Global South that would be great also. We also do loads of work with children in schools.


Buttercream to blow your mind

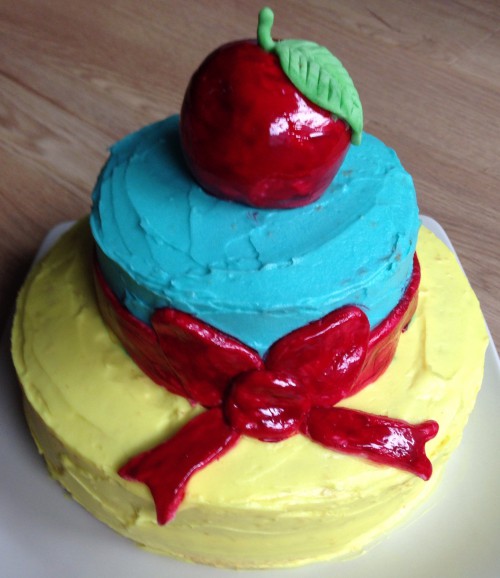
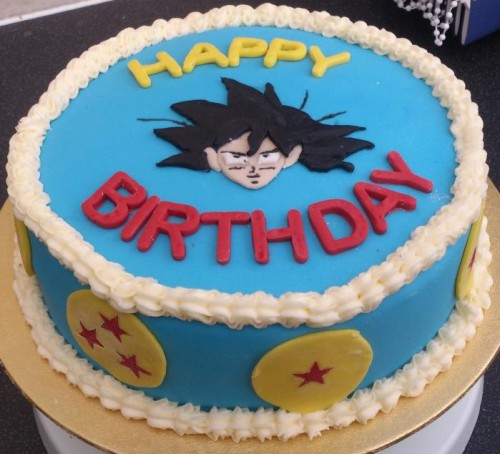
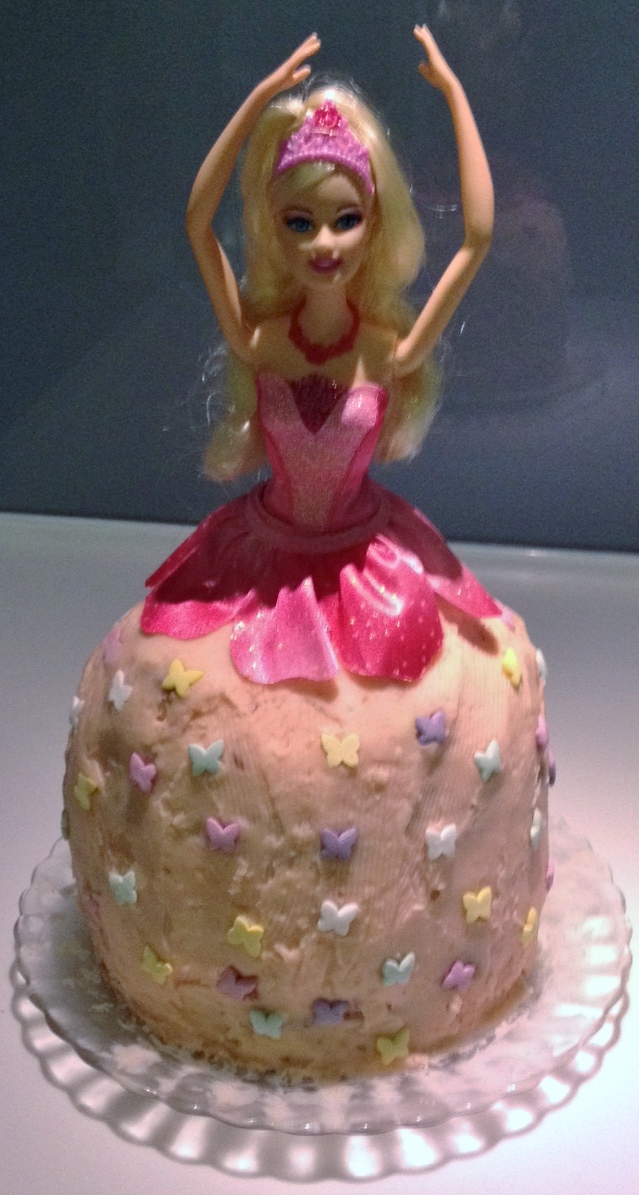
What do Hello Kitty, Spiderman and Peppa Pig have in common?

Apart from the fact that they are all popular requests for FCFK Hackney cakes, the answer is: we can recreate them in buttercream like pros. And we’ll let you into a secret: we most certainly aren’t pros!

So how to we do it? Well, it’s all down to the humble fridge-freezer. All hail the star of the show, the fridge-freezer!

Confused? You soon won’t be. Grab a cup of tea and a slice of cake and settle down for a masterclass. Don’t say we never give you anything!

Introducing…

THE FROZEN BUTTERCREAM TRANSFER
(Full disclosure: we didn’t come up with this ourselves; we are not that awesome and don’t have those skillz. This was taught to us at our Christmas bakers’ social by Super Jess of Cakes 4 Fun fame; she is that awesome and does have those skillz.)

IMG_20140223_223650You will need:
– The image that you would like to adorn your cake with printed/drawn on to a piece of paper. (If it matters which way round the image is, ie. if it includes lettering, then you will need the image in reverse, ie. a mirror image of the true image. Still following?!)
– Some wax paper, or grease proof paper should do the job.
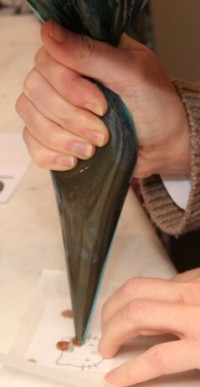
– Some piping bags. Disposable ones are great – you can cut the hole in the end to whatever size you want and a nozzle isn’t necessary.
– Buttercream dyed in as many colours as you want to feature in your image. Note: you don’t want your buttercream too sloppy so go steady if you use milk to loosen it. Also, top tip! If you want black, it’s easier to start with a chocolate buttercream. Yum yum!
– A freezer, and maybe a baking sheet or something stiff and flat and freezer-proof.
– And a cake. Never, ever forget the cake!

What you do:
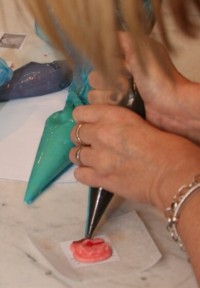
– Get your printed/drawn image and cover it with your wax paper. If you put a tiny blob of buttercream between the two sheets it can stop them moving around and mucking up your design.
– Fill each of your piping bags with the separate colours of buttercream; twist the ends down; and cut the tips off. Note: you can always cut off more if you need more buttercream to come out, but you can’t stick it back on. Less is more. Didn’t your parents tell you that?!
– Take the piping bag of buttercream colour you’d like to outline your image in. If we’re using the example of Peppa Pig, we’d use a dark pink as the outline.
– Carefully, with as steady hand as possible, trace the outline of your image.
– Build up the rest of your image, using other colours where necessary. Peppa, for example, likes a nice rosy pink cheek, a dark pink smile and black dots in white eyes. Remember that your iced image will eventually be turned out so you need to build it up in layers from the outside in. This would mean doing the black pupil of the eye first and then piping over the top with white.
– Once you’ve created your outlines, you can pipe to fill in the design. Back to Peppa and we’d be using pale pink to fill. To get a nice flat design, or a slightly more 3D image, you can pipe over the entire back of your image.
– Then you just need to pop the wax paper with icing on into your freezer. (This is where a baking sheet might come in handy.) And wait for it to set hard.
– And then? Get it out the freezer; peel the buttercream away from the wax paper; place it carefully on your (iced) cake; and step back and admire your handiwork. You are a pro; queen (or king) of the buttercream; give yourself a pat on the back; you’ve earned your place in the FBCT (frozen buttercream transfer to those not in the know!) crew!

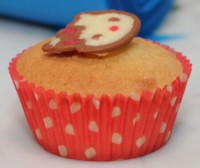
Here’s Hello Kitty (in miniature) step-by-step form (but do bear in mind that the larger the image, the easier it would be, unless you are a Borrower):
IMG_20140223_221547IMG_20140223_214125IMG_20140223_215457IMG_20140223_221041

IMG_20131206_214750And if all that sounds as clear as mud, go and Google videos of frozen buttercream transfer techniques made by someone who actually knows what they’re talking about.

But do trust us on this one!

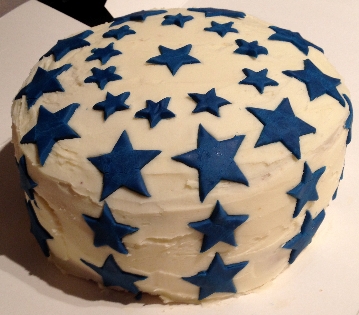
We may suck at writing instructions, but the icing itself really is relatively easy to do and the results are pretty spectacular, as demonstrated by the Spiderman face on this cake made by one of our bakers for one of our Hackney children shortly after she learnt the technique at our workshop. See! It’s so good that you’ll want to try it out immediately!

FBCT FTW say FCFK Hackney!


Cake of the month – January 2014

When we told this baker that we’d chosen her cake as our “cake of the month” for January she was super happy because, she said, she never wins anything! The thing is though, as cheesy as this may sound, it’s the child who received this cake, not her, who is the real winner. We know, we know, that is Cheddar overload, with a side helping of brie, but it’s true.

PS: How do you get a mouse to smile? Say cheese!

FCFK - star cake againName of baker: Anna Greenwood

Name of cake: Star cake (victoria sponge with jazzy accessories)

Ingredients:
Cake:
Five eggs
Same weight as eggs of self-raising flour, sugar (well a little less tbh) & butter
2 tsp Vanilla extract
Blue or whichever colour food dye (optional)
Buttercream:
500g Icing sugar, 250g butter
1tsp vanilla extract
Jam
Ready roll blue or whichever colour icing

Method:
Cream together butter and sugar until light and fluffy.
Add eggs, beating in one at a time.
Fold in the flour.
When all mixed together divide between two tins and bake at 160 fan or 180 for 30 minutes or thereabouts.
Whilst baking, make the buttercream by mixing all ingredients together.
Remove cakes from oven and leave to cool on a rack. When cool, put a third of the butter cream on one cake, jam on the other and sandwich together. Spread the rest of the buttercream on the cake. Decorate with stars cut out from the coloured icing.
Admire your handiwork.
Eat (unless you’re providing it as a gift, then don’t eat).

If you like you can dye one cake layer a different colour by dying half the batter in a separate bowl. Please note you probably need more dye than you think otherwise it can come out looking a bit grey and sad. Then when it comes to icing, split both cakes into two then alternate them so it’s stripey inside. But you don’t have to. It’s merely a suggestion.

About the baker:
I am a DJ and performer and live in Dalston. I enjoy baking, but don’t do it a lot as I live in a household of one and would end up eating cake for every meal so I tend not to. Even though I would like to. I bake for FCFK Hackney as it’s a great idea and is more personal than making a charity donation. Plus it’s great fun and satisfies my baking urges without compromising my thighs.